How to resize an image in Photoshop and keep the best quality – We use photos for many purposes. In different sectors, different sizes of photos are needed. Whether it is E-commerce platforms or social media, image size requirements are different in different platforms. To get the perfect view of a picture, we need to upload the image maintaining the required size. When the image size doesn’t match the requirement, we lose the full view of that image. Are you also facing the same problem and looking to get rid of it? Resizing the image is the solution here. When we resize an image, we lose some pixels that damage the image quality. Is there any method to resize an image without losing the quality? Thankfully, yes.
In this article, I am going to reveal two best methods of how to resize an image in Photoshop and keep the best quality. Both methods are easy to follow and take only a few minutes.
Are you getting excited to know about the methods? Without any further delay, let’s start.
How to resize an image in Photoshop and keep the best quality
Allow me to start with Method 1.
Method 1: Resize an Image using ‘Image Size”
I am going to show you with this picture how to resize an image using the image size option in Photoshop.

You can apply the instruction to any version of Photoshop.
Step 1: Go to the “Image Size”
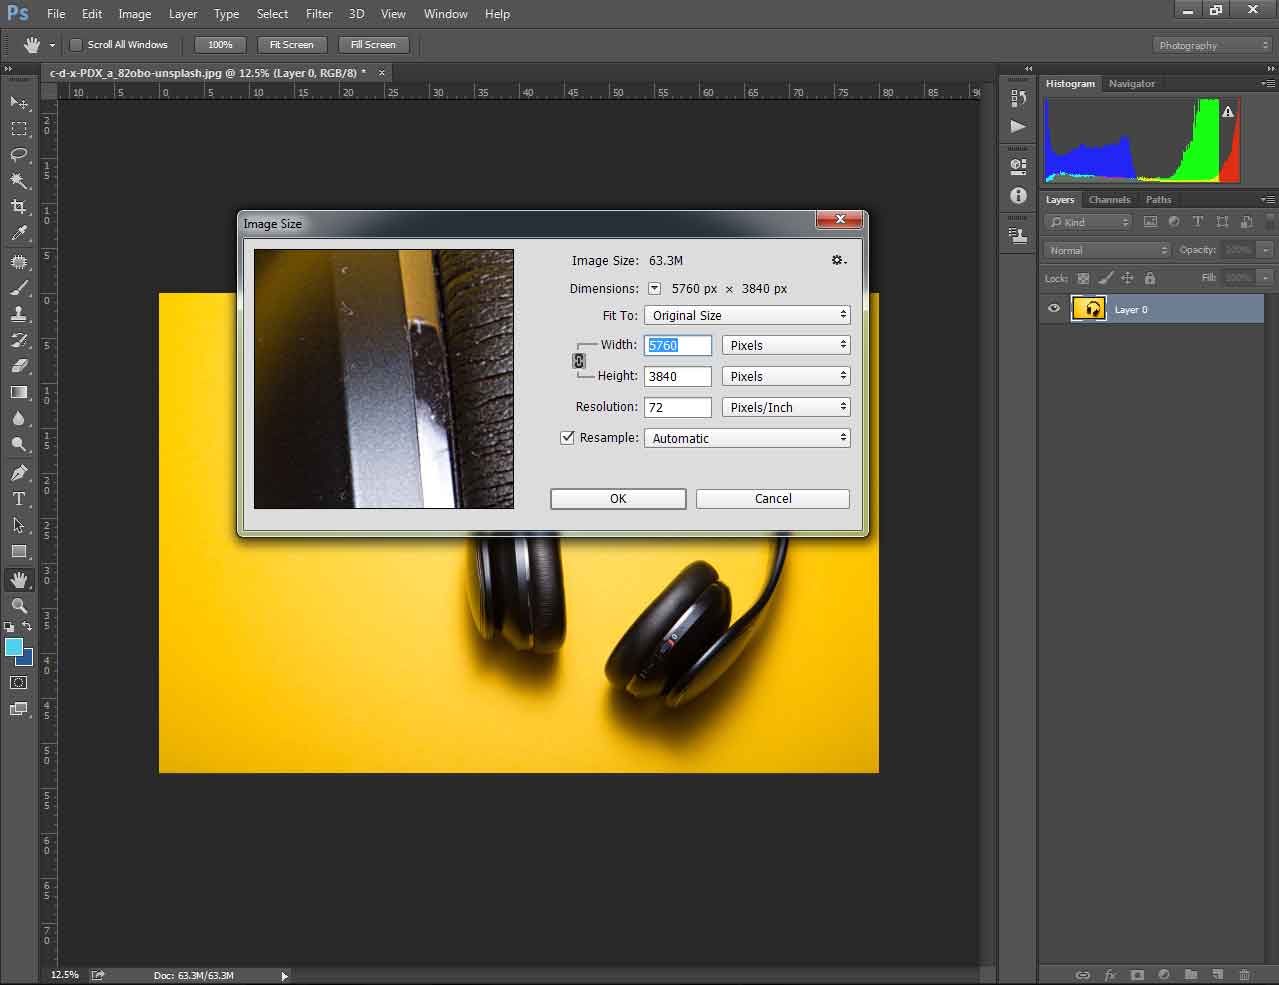
First of all, you have to go to the image option from the top and click on the image side. It will bring a box showing you the Width, Height, and Resolution of the image.

Here you can see the dimension of our sample image is too high. Most E-commerce platforms don’t allow you to upload a picture higher than 3000 pixels. Let’s reduce the image size without losing the quality.
Step 2: Set required size
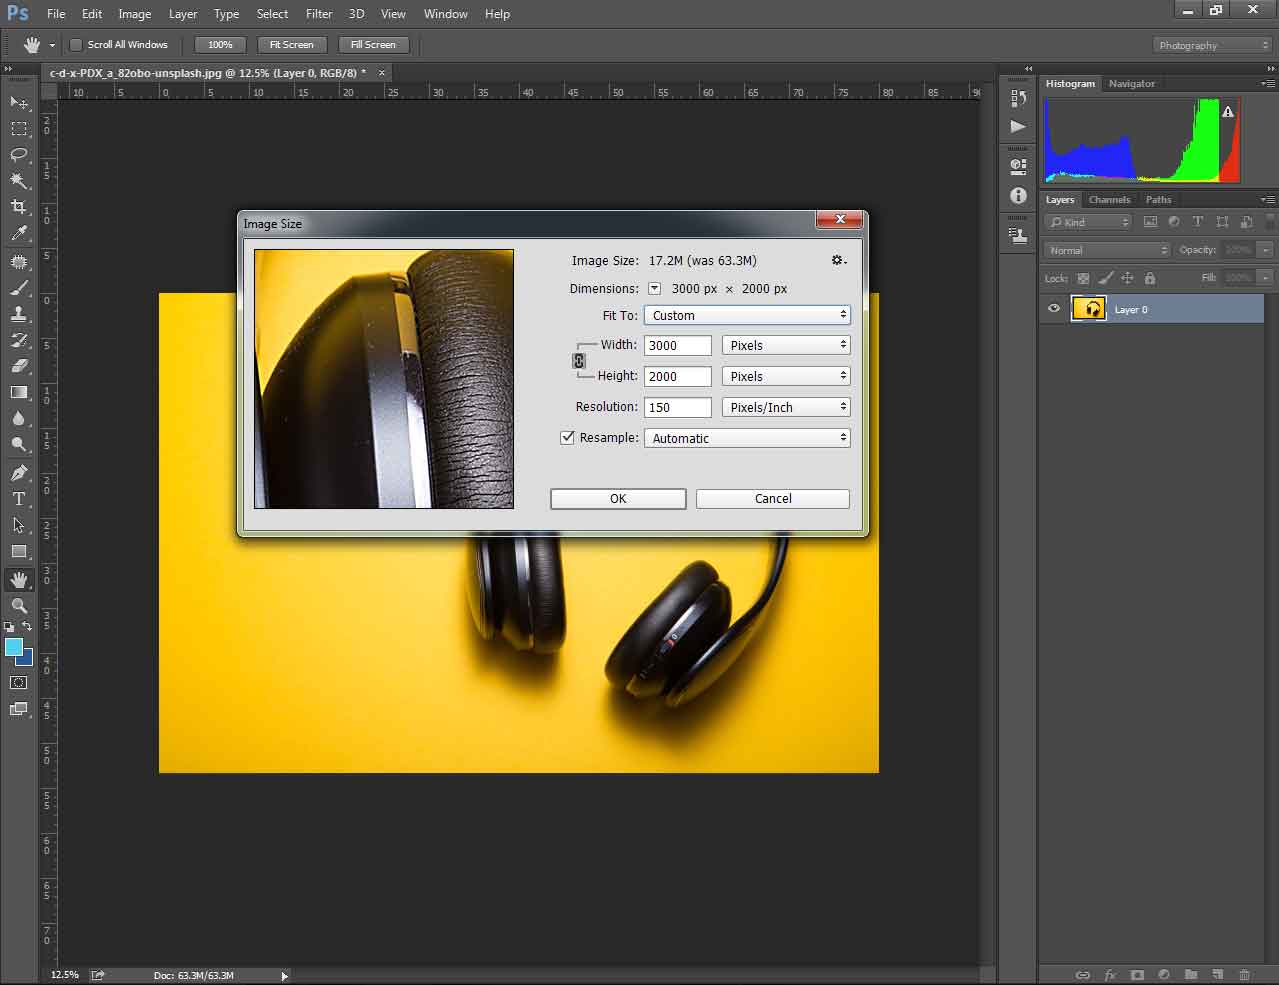
Set your required size on that “Image Size” box.
I want to keep the width 3000 pixels and height 2000 pixels.

Make sure that the pixel is selected on the right box. If you want to resize your image in different units, you need to change the unit.
Step 3: Set the higher resolution
The primary Resolution was 72 pixels per inch. We have to set a higher resolution so that the image doesn’t lose its quality. I am going to set the resolution to 150 pixels per inch. You can higher or lower this value depending on your image’s primary resolution.
Press enter after putting the value.
Here is the final result.

By following this easy technique, you can change the image size and keep the best quality. That is the end of method 1.
Now, you are going to learn how to increase the image size in Photoshop without losing quality.
Method 2: Resize an Image Using “Smart Object”
In this method, we will Convert the image into a smart object, then we will increase the size of our image. Let’s do that.
Step 1: Make a new document
First, you need to take a new document. Go to the File option and click on the new. Choose your required size from this box and then click on Ok.

It will create a new blank document.
Step 2: Convert to smart object
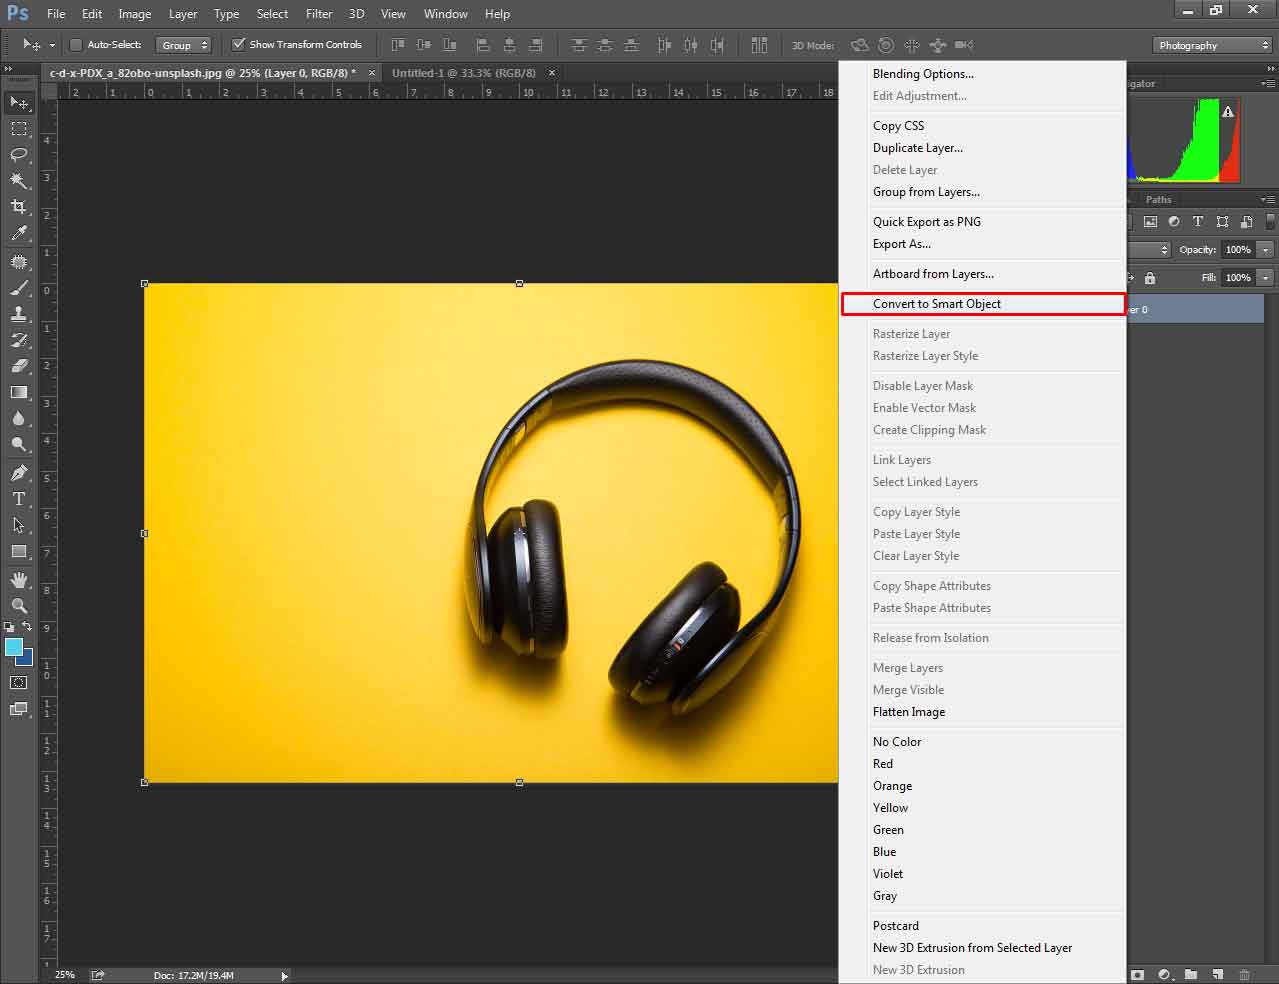
Right-click on the background layer of your image and choose the “ convert to smart object”. The benefit of a smart object is that it doesn’t lose its details in any size.

Now, select the move option from the left editing bar. Then, you have to drag the picture and release it on the blank layer.

At this point, we are just one step behind the final result.
Step 3: Free Transform
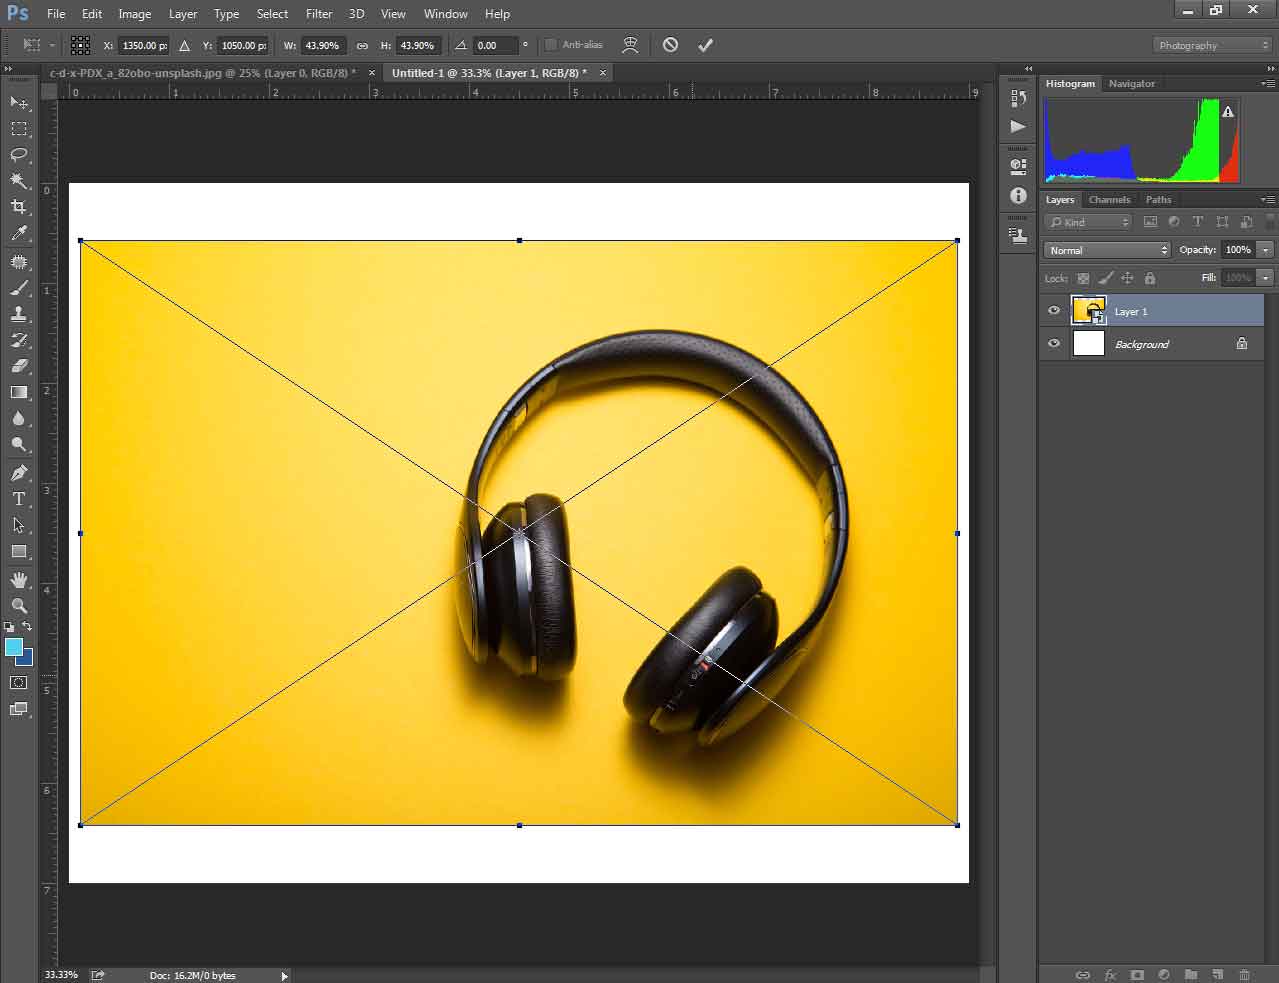
Now, you have to use the shortcut ‘CTRL + T’ to enable free transform. After that, press and hold the shift key. Along with this, stretch out the image and make the size similar to the canvas. Want to have a look at the example? Here you go.

Next to this, confirm the changes from the stop sign option. Here is the final result.

So, we have successfully resized an image in Photoshop and kept it to the best quality. Do you know why we need to resize an image? Allow me to inform you briefly.
Why is resizing an Image important?
For online use, different websites have set different types of image size requirements. For example, you are an Amazon seller. your images should meet the criteria of Amazon Image size requirements. If the image size doesn’t meet the criteria, your image will not get approval. Again taking the picture is a lengthy and costly process.
In that case, resizing an image is the convenient and budget-friendly option. You can get your picture in different sizes and use them on different platforms.
Get Image Cropping and Resizing Services
CPR Graphics Firm provides Professional Image Cropping and Resizing service at a cheap rate. Clipping Path Retouching Graphics Firm is a reputed Photo Editing Service Provider Company having 5 years of experience.
You can give the responsibilities of your images to them. You will crop and resize your image keeping the best quality. Thinking about privacy? No third party can access your images.
Who needs image cropping and resizing services?
- Amazon Seller
- eBay Seller
- Product advertisers
- E-commerce Owners
- F-commerce business
- Photographers
- Studios
- Freelance photographer
- Print Media
Final Thoughts
You should have got all the answers about how to resize an image in Photoshop and keep the best quality. From now on, you can increase and decrease the size of an image without losing quality.
Want to read more articles like this one? Keep connected with us. Share your thoughts about the article in the comment box. Wish you all the best.
FAQ
Q: How do you adjust the size of an image in Photoshop?
A: From the image size option, you can adjust the size of an image.
Q: How do I resize an image manually?
A: Photoshop image size feature provides you the option of resizing an image manually.
Q: What is Ctrl T Photoshop?
A: It enables the free transform option.
How to resize an image in Photoshop and keep the best quality
Published By
CPR Graphics Firm
