
How to Make an Animated GIF in Photoshop – Animated Gifs can grab your attention more effectively compared to still images. If you don’t know about Animated Gif, let me inform you that it is an image file that supports both moving and static images. Nowadays, Gifs are noticeable almost everywhere online. Creating Gifs is interesting and also it can be useful when you want to express your emotion or grab someone’s attention. Are you thinking about creating an Animated Gif?
Whenever we think about any type of image editing method, somehow the word “Adobe Photoshop” comes to our mind. Photoshop can help us in editing static imagery. But, what about making Animated Gifs in Photoshop?
Thankfully, Photoshop can also assist us in making an Animated Gif. Through this article, I am going to inform you about how to make an Animated Gif in Photoshop in simple ways. You don’t need to be a Photoshop expert to follow the instructions. It will take appropriately less than 10 minutes. Follow the step-by-step guidelines and you will be able to make animated Gifs in Photoshop within a short time.
Let’s make a dive into the tutorial.
Step-by-step Guidelines of How to Make an Animated GIF in Photoshop
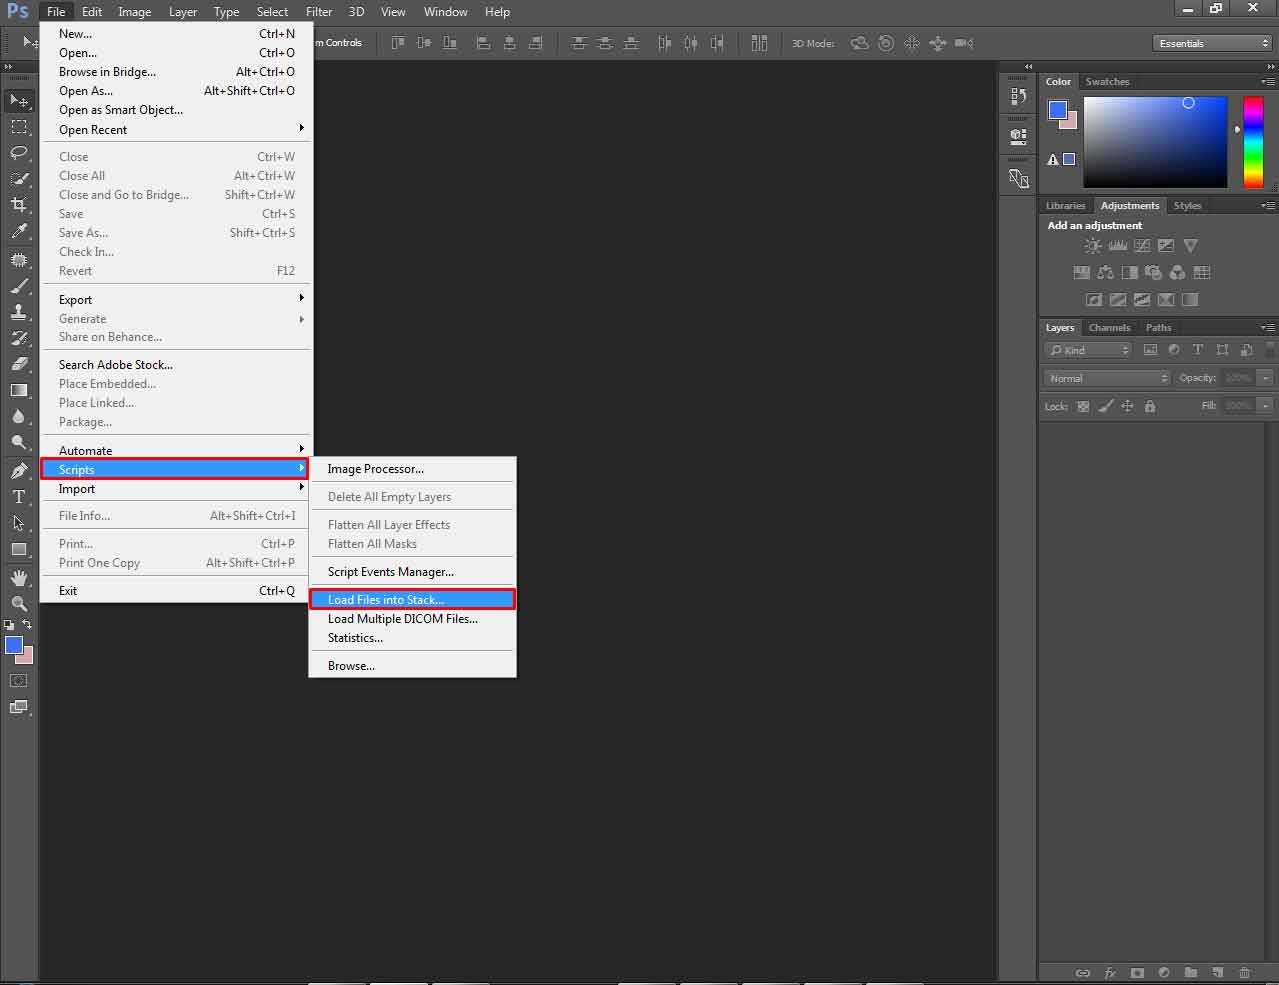
Step 1: Load Images into Stack
Right at the beginning, you have to open Photoshop and click on the file option from the top. Open the scripts option from that list and choose “Load files into stack”.
After that, click on the “browse” and it will show you the option to choose pictures from your computer. Open the file location and select those static images that you want to convert into animated Gifs. I have selected those images for making an animated Gif.

After picking the images, press “Enter” and then click on the “OK”. After that, Photoshop will open those images as an individual layer.
Step 2: Create Frame Animation
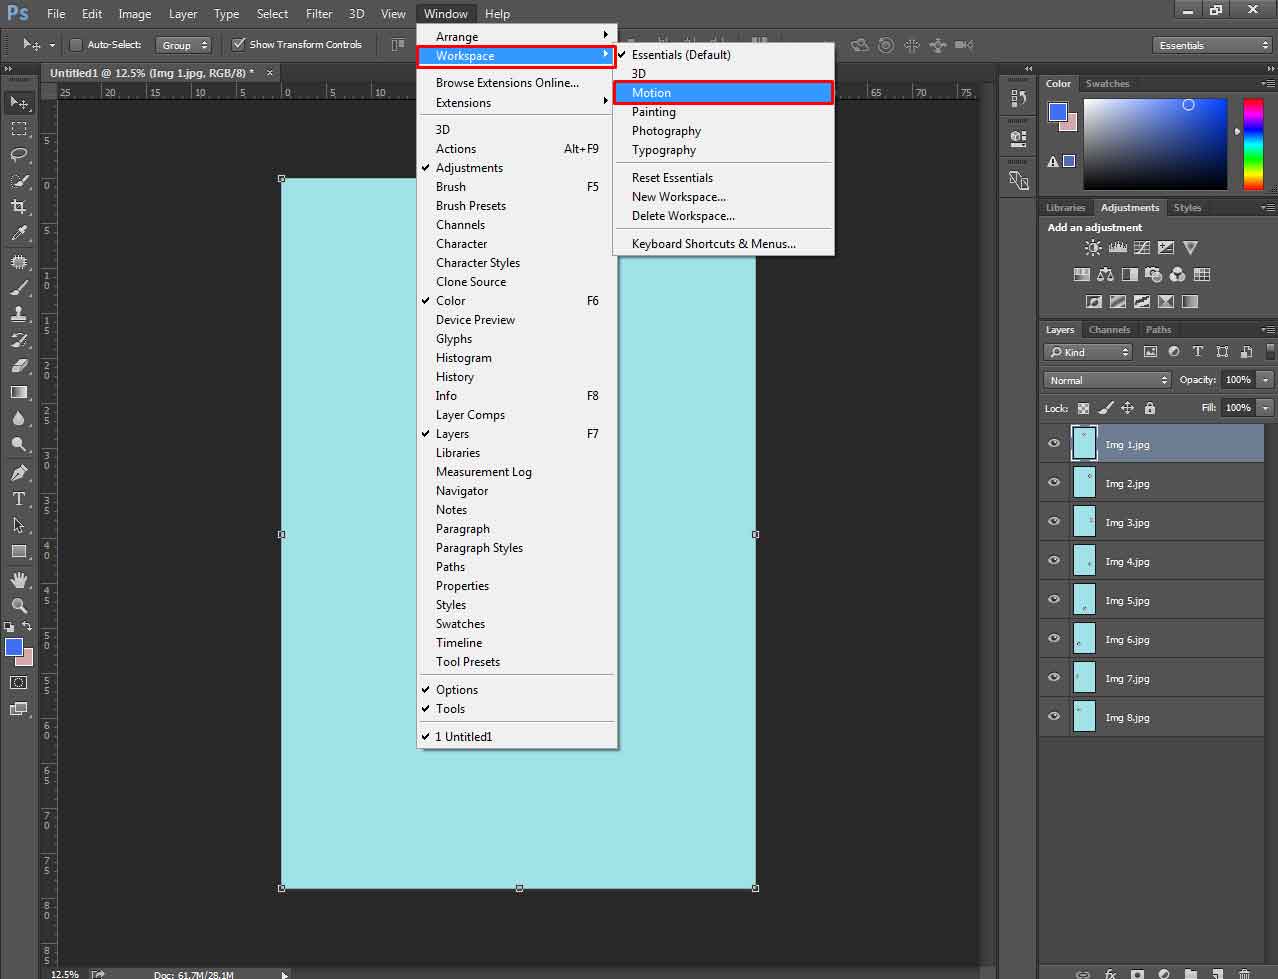
After loading those images, you will notice “Timeline Display” on the bottom side of the screen. If you don’t find that, go to the Window option from the top. From there, choose “Motion” from the “Workspace”. It will make the timeline bar visible.
After making the timeline bar visible, click on the “Create Frame Animation” from that bar.
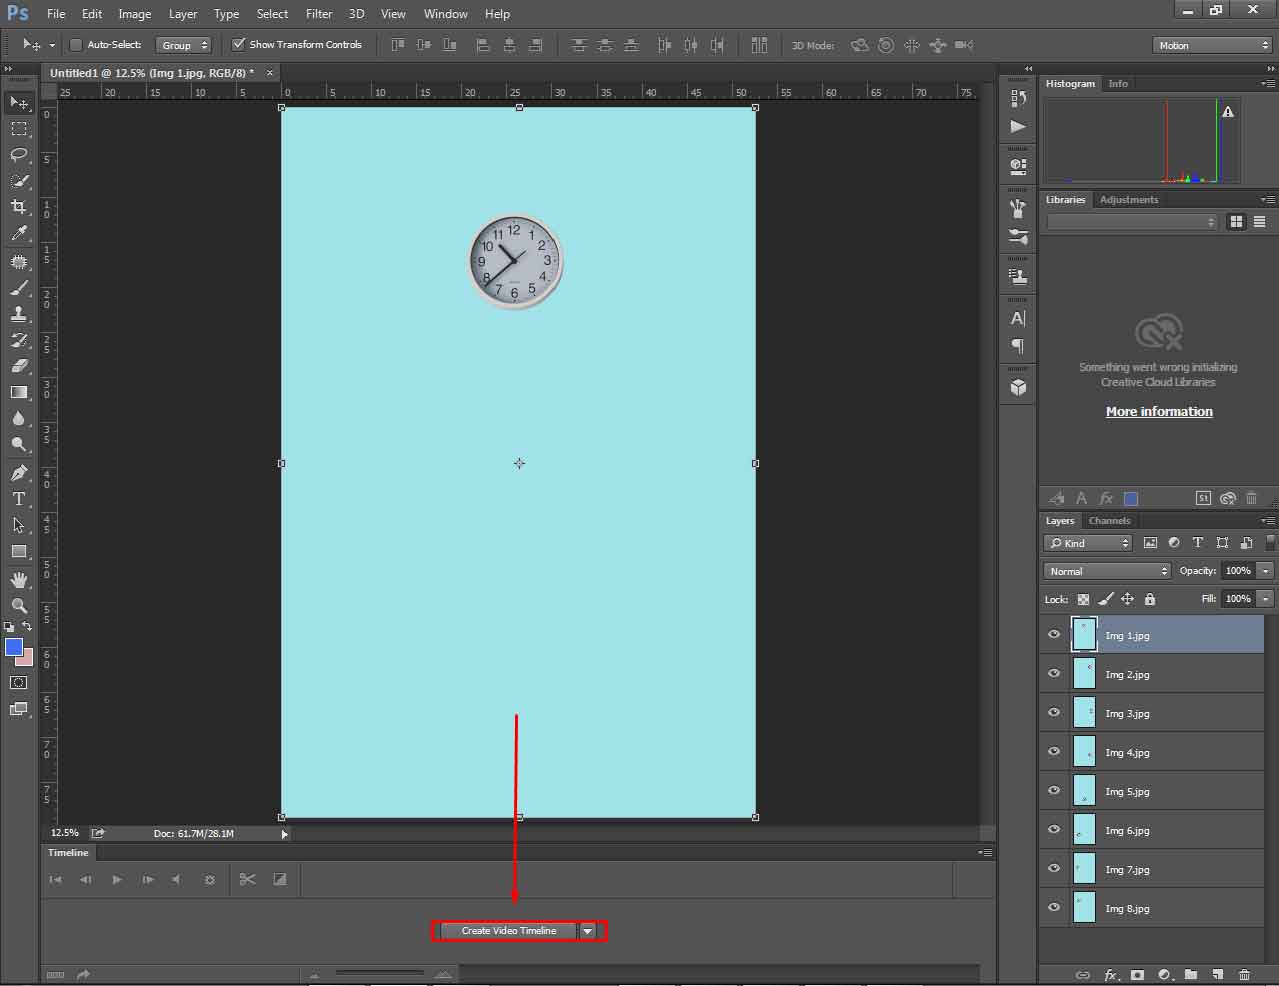
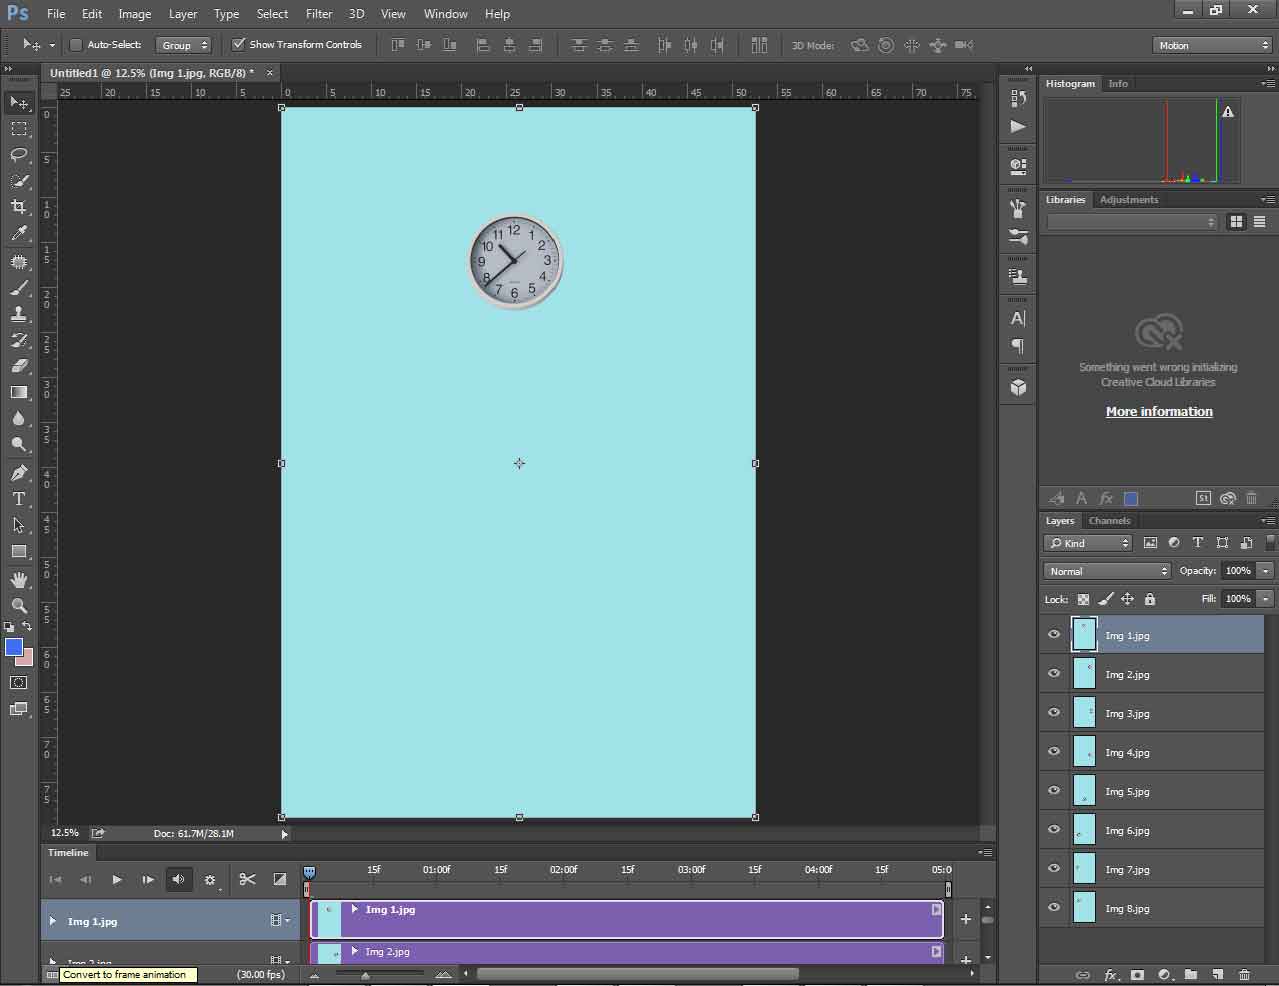
Later on, you will notice the images appearing as slides on the timeline display. Now, it is time to move into the 3rd step.
Step 3: Making Frames from Layer
In this step, we are going to create frames from each layer. From the bottom of your screen, you will find out all images that you have imported in Photoshop. Now, we need to select all of those images.
To do that, press “CTRL + Left Mouse” on the image, and the image will be selected. Make a selection of all images applying the same method.
After that, click on the expandable options from the top of the right side of the timeline. You will find an option called “Make frames from Layer”.

At this point, we have to set the timing for our animation. How to do that?
Let’s jump into the next step and get to know about the procedure.
Step 4: Set timing for the Animation
In this step, we are going to choose how many times the frames will be played. You can find the timer option from the below section of the timeline.
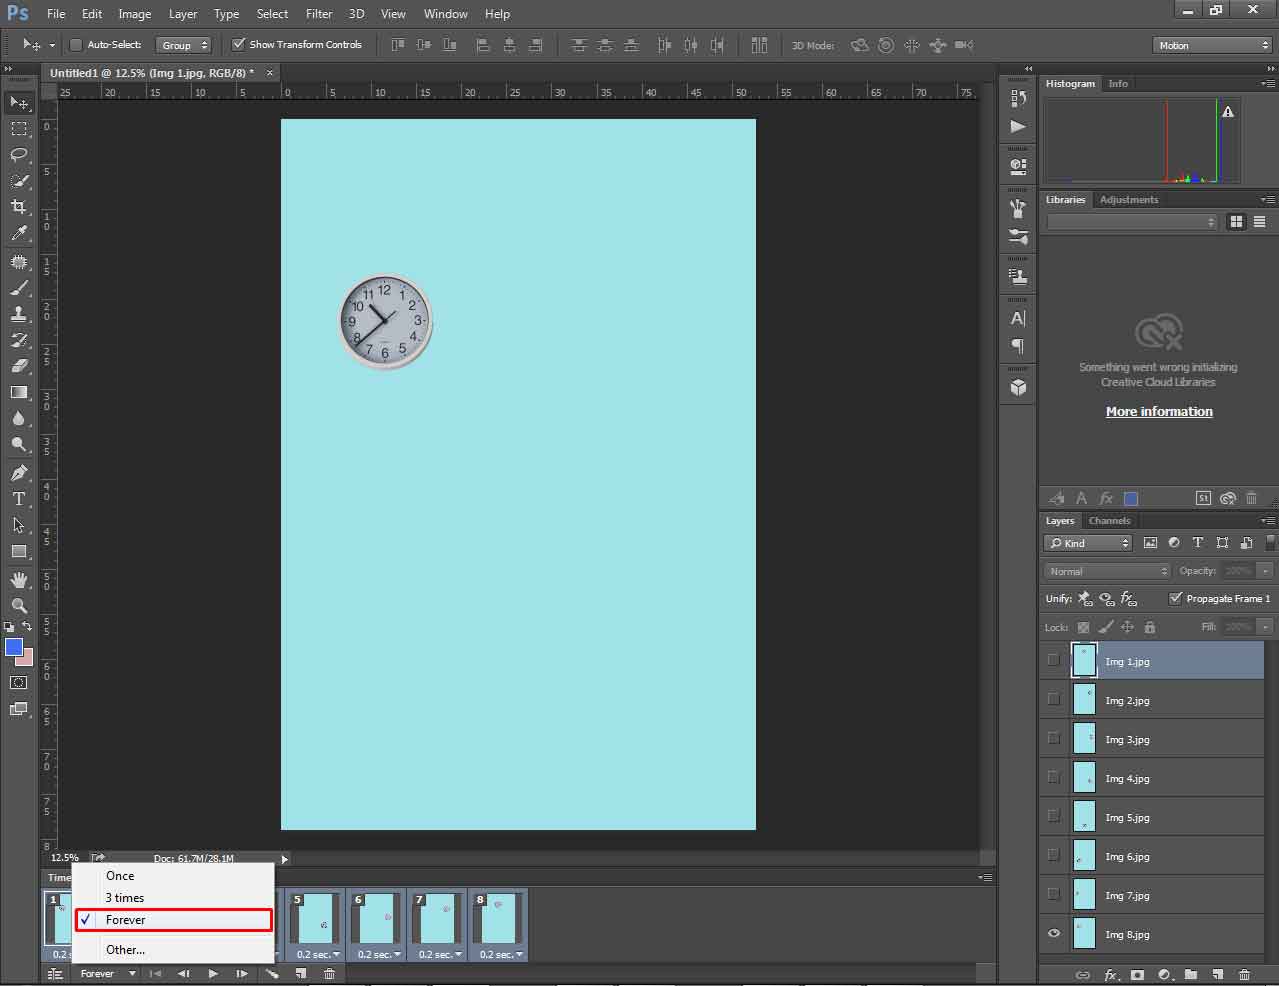
Three options are available at the timeline. Those are once, 3 times, and forever. If you set the option to once, it will play the animation only once. Then, it will stop repeating the frames.
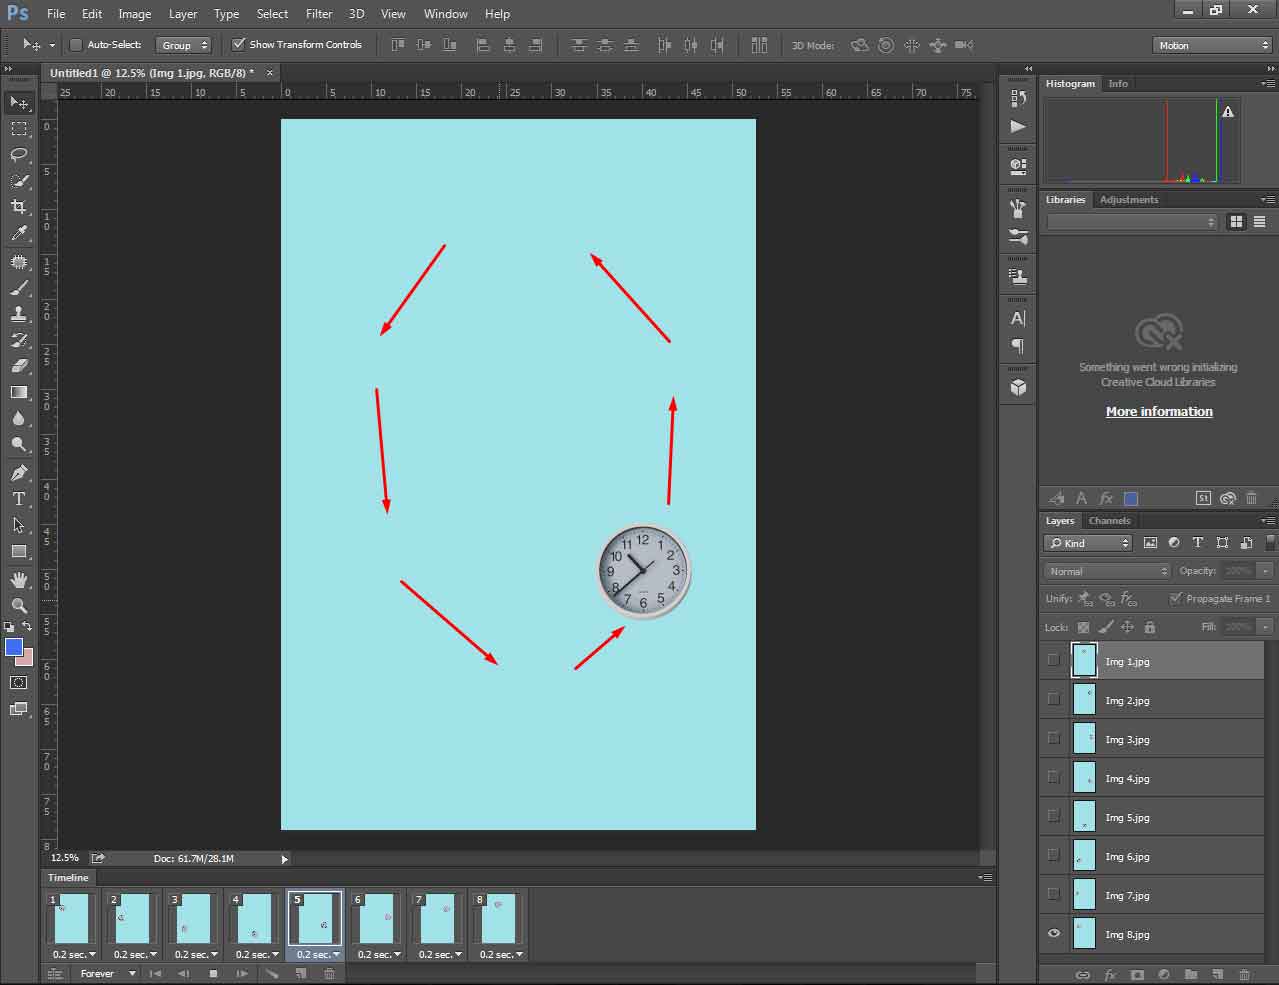
Choosing 3 times will play the frame thrice. When you pick the forever option, it will keep playing the frames. Here, we are going to choose forever. After that, you need to press on the play option and the clock will seem to be moving in this direction. This is our created animation.
Step 5: Saving the Animated Gif
At this point, we have created an animated gif in Photoshop. Now, we have to save it to our computer so that we can use it later on.
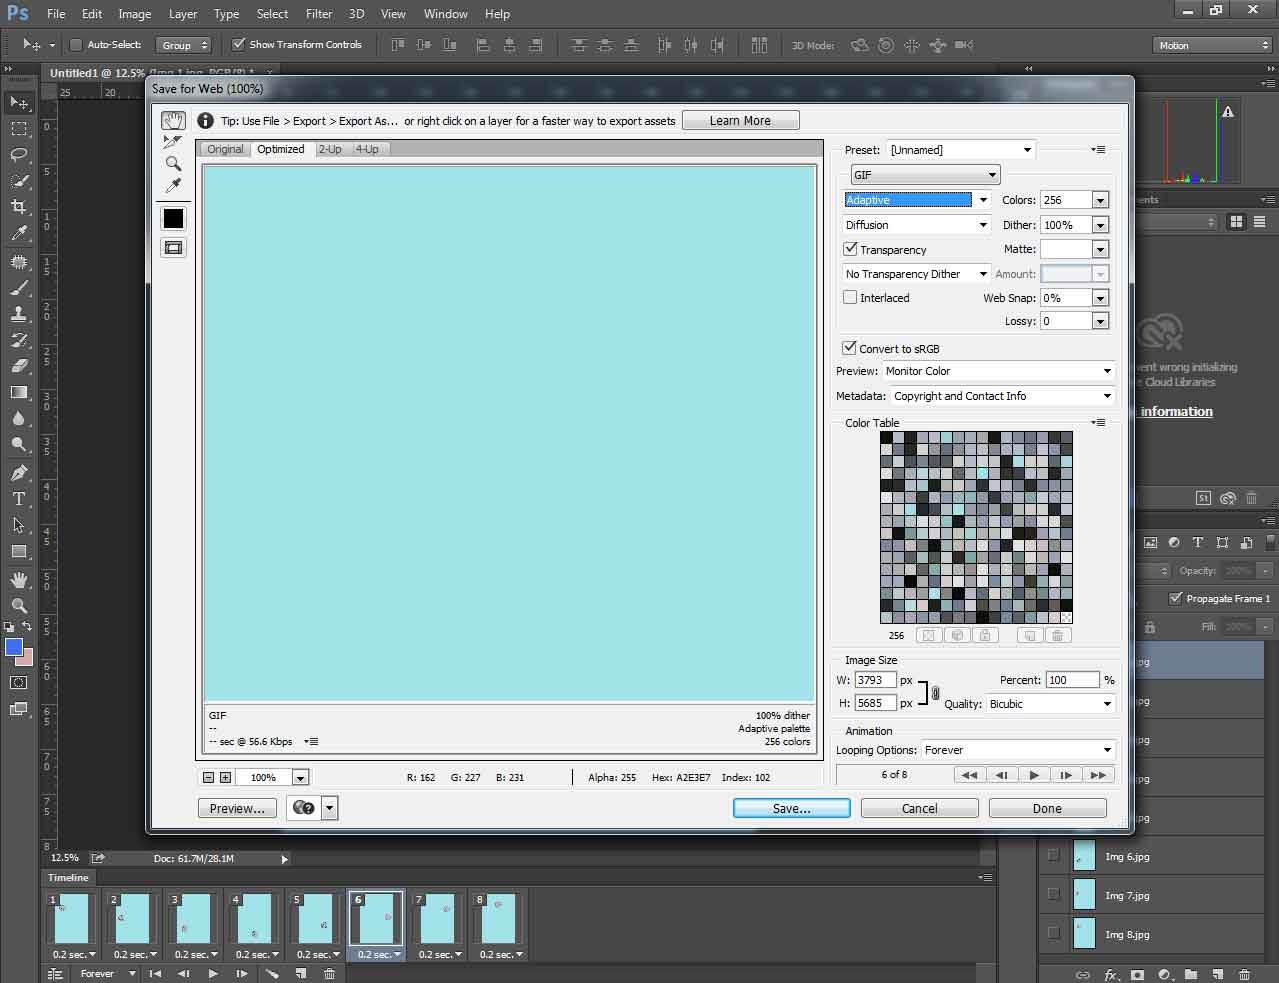
Go to the File option and click on the “Export”. Then, you have to choose the “Save for web” option. You can also use the shortcut “ALT + SHIFT + CTRL + S”.

Next to this, it will bring you to a new window like the one below.
So, that’s the procedure of how to make an Animated Gif in Photoshop and save it to the device. By following these easy instructions, you will also be able to create animated Gifs in Photoshop.
Now, I would like to inform you why Animated Gifs are useful and how it can give you some advantages. Are you curious to know about it?
Let’s move forward.
Why Animated Gifs are used?
If you are selling products online, animated Gifs will be useful for you. You can promote your products using an animated gif. Do you know what advantage it brings? With a single Gif file, you can showcase your product from different angles and views. It increases the chances of getting more engagement.
We all know that images can grab attention more effectively than texts. The animated gif can do it even more effectively compared to the static image. Motion images can explain a product in a better way. Also, it is mobile-friendly and online-friendly. You can use animated gifs on various marketing platforms and social media.
Get Animated Gif Creation Service
Are you looking for Professional Animated Gif Creation Service for your E-commerce Product Photos? CPR Graphics Firm provides top-quality Animated Gif Creation Service at a Reasonable price. CPR Graphics Firm is well known as a top-notch Photo Editing Service Provider.
Want to check the quality? You can take a free trial now.
Who needs Animated Gif Creation Service?
- Online Sellers
- Product Promoters
- Advertisers
- Website Owners
- E-commerce Owners
Final Thoughts
That’s it for today. Hopefully, you have learned how to make an Animated Giff in Photoshop. It is much easier than creating video animation. At the same time, this is a great and convenient way to promote a product or express emotions through moving images.
Would you like to read more useful articles related to Photography? Stay tuned with us. Best wishes to you.
FAQ
- Can you make animation with Photoshop?
- Using Photoshop, you can create Animation Frames and save them to a gif file.
- Why can’t I find the timeline option in Photoshop?
- Go to the “Window” option followed by the ‘Workspace”. Then, click on the motion.
- How to save Animated Gif in Photoshop?
- A. You have to select “File” > “Export” > ‘Save for Web”.
How to Make an Animated GIF in Photoshop
Published By
CPR Graphics Firm